


Our Sauna Blog, Sauna
How to Build a Sauna Outside? A Full A-Z Guide

Jul
Thinking about building you own outdoor sauna? Look at our complete guide that will help you understand exactly how to do it including materials, costs and more.
Outdoor Sauna Kit or DIY?
Thinking about creating your own backyard oasis with a relaxing outdoor sauna? Look no further! This guide will be your one-stop shop for everything sauna-related. We’ll break down all the steps, from figuring out how big you want your sauna to be to picking the perfect materials and even building it yourself (or finding a pre-built option). So grab a drink, get comfy, and let’s get you on the path to enjoying the benefits of outdoor saunas in your own backyard.
Building your own outdoor sauna can be a rewarding experience, but before you dive in, consider the two main routes: purchasing a sauna kit or building entirely from scratch. Each approach has its pros and cons, so it’s important to choose the one that best suits your skills, budget, and desired level of customization.
Sauna Kit
- Time: Sauna kits are significantly faster to construct. Most kits come pre-cut and pre-drilled, requiring assembly rather than extensive construction.
- Cost: Kits can be more expensive upfront compared to sourcing your own materials. However, they can be more cost-effective in the long run, as they eliminate waste and the potential for mistakes during construction.
- Expertise: Sauna kits typically require moderate DIY skills for assembly. The instructions are usually detailed, and some companies even offer customer support during the building process.
- Professionals Needed: In most cases, you won’t need to hire additional professionals when using a sauna kit.
DIY Sauna
- Time: Building a sauna entirely from scratch is a much more time-consuming process. It requires planning, material selection, cutting, and construction.
- Cost: You can potentially save money on materials by sourcing them yourself. However, factor in the cost of tools and potential wasted materials due to errors.
- Expertise: Building a sauna from scratch requires a good understanding of construction principles, carpentry skills, and knowledge of proper ventilation and insulation techniques for your specific climate (consider factors like cold Canadian winters or hot, humid summers in the Southern US).
- Professionals Needed: Depending on your skill level, you might need to hire professionals like electricians or plumbers for specific tasks.
Here’s a table summarizing the key differences between using a sauna kit and building your own:
|
Feature |
Sauna Kit |
DIY Sauna |
|
Time Commitment |
Lower |
Higher |
|
Cost |
Potentially Higher Upfront |
Potentially Lower Overall |
|
Expertise Needed |
Moderate DIY Skills |
Carpentry Skills & Construction Knowledge |
|
Professionals Needed |
Typically None |
Electrician or Plumber (Depending on Skill Level) |
Choose the Size of Your Outdoor Sauna
The size of your outdoor sauna is a crucial decision. It should be large enough to comfortably accommodate you and your guests, but not so big that it becomes impractical to heat or takes up valuable yard space. Here are some key considerations:
Number of Users:
- Regular Users: Think about how many people will typically use the sauna at once. If it’s just for you and your partner, a smaller sauna might suffice.
- Hosting: If you plan on using the sauna for social gatherings, factor in how many guests you’d like to comfortably host.
- Spaciousness: Consider how much personal space you prefer. While a larger sauna offers more freedom of movement, a smaller one can feel cozier.
Additional Considerations:
- Bench Layout: The layout of your benches will also impact the number of people who can comfortably use the sauna. L-shaped benches can maximize space in larger saunas.
- Storage: Do you want built-in storage for towels, robes, or sauna accessories? This will require additional square footage.
- Changing Area: If you plan on incorporating a changing area into your sauna structure, you’ll need to factor in the additional space needed.
Sauna Size Guide:
Here’s a table to help you visualize the typical size ranges for different sauna capacities, including recommended heights:
|
Capacity |
Minimum Floor Area (sq ft) |
Recommended Floor Area (sq ft) |
Minimum Height (ft) |
Recommended Height (ft) |
|
1-2 Person |
36 – 49 |
49 – 72 |
6’6″ |
7′ – 7’6″ |
|
3-4 Person |
54 – 72 |
72 – 100 |
6’6″ |
7′ – 7’6″ |
|
5-6 Person |
72 – 100 |
100 – 144 |
6’6″ |
7′ – 7’6″ |
|
7-8 Person |
100 – 144 |
144 – 196 |
6’6″ |
7′ – 7’6″ |
Remember: These are just general guidelines. The best size for your sauna will depend on your specific needs and preferences.
Choose the Location of Your Outdoor Sauna
Selecting the perfect spot for your outdoor sauna is key to maximizing enjoyment and functionality. Here are some crucial considerations to ensure your sauna is conveniently located and can withstand the elements:
- Access to Water: You’ll need a nearby water source to throw on the hot rocks for steam production and for post-sauna rinsing. Consider the distance from your house hose or another water supply.
- Route to the House: Placing your sauna too far from your house can be inconvenient, especially in colder climates. A clear, well-lit path is ideal for safe and easy access during winter or at night.
- Drainage: Avoid placing your sauna in low-lying areas prone to flooding or where water can pool around the foundation. Ensure proper drainage to prevent moisture build-up and potential rot.
- Sun Exposure: Consider how sunlight will affect your sauna experience. In colder climates, south-facing placement can take advantage of solar heat gain during the day. However, excessive sun exposure in hot climates can make the sauna pre-heat unintentionally.
- Electrical Access: Saunas require a dedicated electrical circuit to power the heater. Choose a location close enough to an existing electrical line to minimize complex and expensive wiring runs.
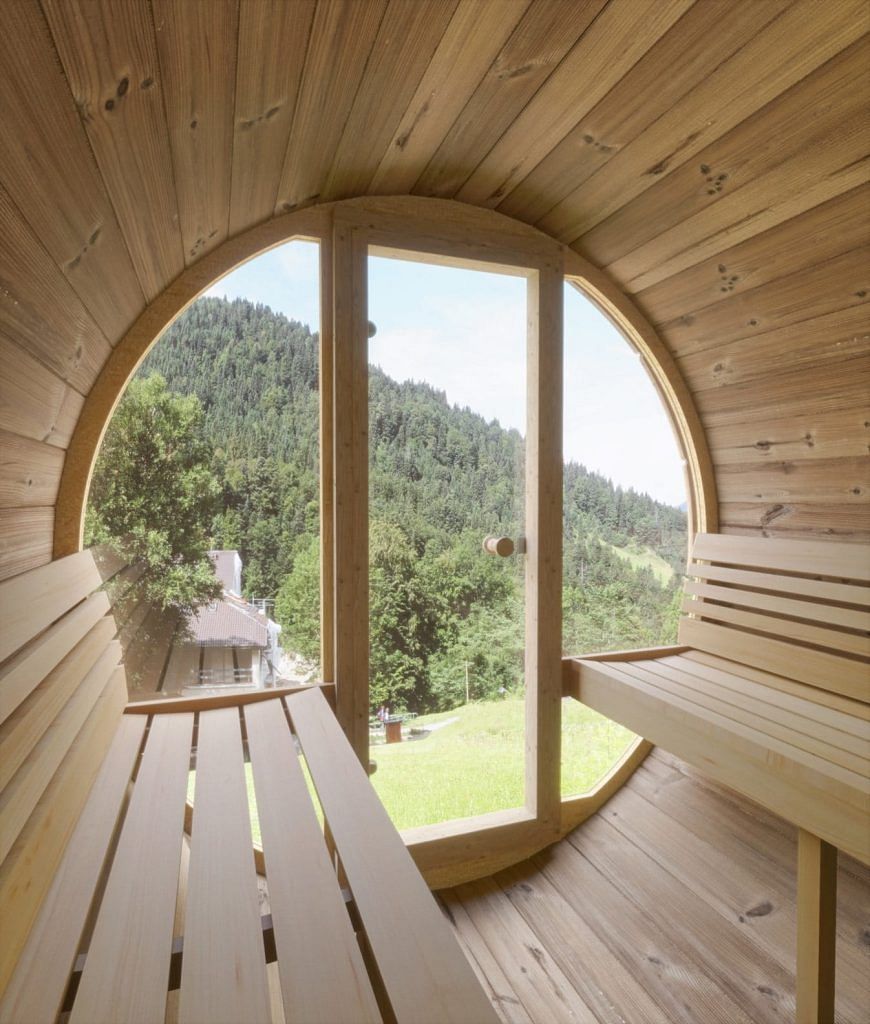
- Privacy and Views: Think about privacy while using the sauna. Consider fencing or landscaping to create a secluded space. If you have a scenic view you’d like to enjoy, position the sauna accordingly.
- Safety Clearances: Maintain a safe distance from property lines, flammable materials, and overhead objects (power lines, tree branches) according to local building codes.
By carefully considering these factors, you can ensure your outdoor sauna is conveniently located, offers a comfortable experience, and remains functional for years to come.
Collect Your Materials
Wood
The type of wood you choose for your sauna is crucial. It should be resistant to heat, moisture, and warping. Here are three of the most common and reliable options for outdoor saunas in Canada and the USA:
- Western Red Cedar: A popular choice due to its beautiful reddish hue, pleasant aroma, and excellent natural resistance to moisture and decay. Western Red Cedar is a good all-around option for most climates in North America.
- Eastern White Cedar: A lighter-colored wood than Western Red Cedar, Eastern White Cedar offers similar moisture resistance and a slightly more affordable price point. It’s a good choice for saunas in moderate climates, but may require additional treatment for harsher winters.
- Thermally Modified Wood: This isn’t a specific wood species, but rather a process that modifies the wood structure to enhance its dimensional stability and resistance to moisture and decay. Thermally modified woods like Thermolu Spruce or Accoya can be a good option for saunas in regions with extreme cold or wet conditions. Read more about our comparison of thermowood vs cedar
Remember: Always choose wood that is specifically kiln-dried for sauna use. Avoid using pressure-treated lumber, as the chemicals can be harmful at high temperatures.
Floor
The sauna floor needs to be comfortable underfoot, durable in hot and humid conditions, and allow for proper drainage. Here are some recommended options:
- Treated Wood Slats: Thin slats made from moisture-resistant wood like Western Red Cedar or thermally modified wood are a common choice. Leaving a small gap between each slat allows water to drain and prevents moisture build-up.
- Concrete Slab with Epoxy Paint: A poured concrete slab creates a solid and stable base. Sealing the concrete with a waterproof, heat-resistant epoxy paint protects it from moisture and provides a smooth surface. This option is particularly suitable for larger saunas or those with frequent use.
- Tile: Ceramic or porcelain tiles offer excellent durability and water resistance. Choose a textured or non-slip tile to prevent falls, especially when wet. This option requires a sloped floor design to ensure proper drainage towards a drain outlet.
Whichever option you choose, ensure the floor slopes slightly towards a drain to prevent water from pooling. This is crucial for preventing moisture build-up, mold growth, and potential rot.
Insulation
Proper insulation is essential for an efficient outdoor sauna. It helps retain heat inside the sauna, reducing heating time and energy costs. Here’s the most recommended material for insulation in saunas:
- Mineral Wool (Rockwool): This fire-resistant and heat-resistant insulation is ideal for saunas. It offers excellent thermal performance, effectively trapping heat inside the sauna walls and ceiling. Mineral wool is also breathable, allowing moisture vapor to escape, which is crucial for preventing mold and mildew growth within the sauna structure.
Thickness:
The recommended thickness of mineral wool insulation for outdoor saunas in North America typically ranges between 2-4 inches (50mm – 100mm). Colder climates may benefit from the thicker option, while moderate climates can opt for the slightly thinner version. Always follow the specific recommendations from your chosen sauna kit provider or consult local building codes for guidance on insulation thickness requirements in your area.
Choose Your Heat Source
The heat source is the heart of your sauna, and the choice you make will significantly impact your sauna experience. Here’s a breakdown of the three most common options for outdoor saunas:
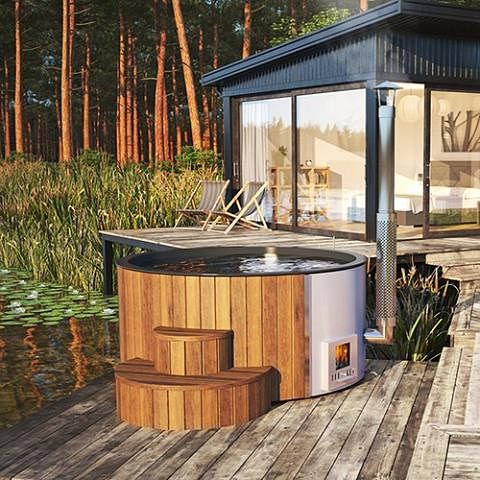
- Wood-Fired Sauna Heater: A traditional and authentic choice, wood-fired heaters provide a radiant heat that many users find particularly enjoyable. They offer a quick and powerful heat source, but require more maintenance and attention to fire safety. Wood-fired heaters are well-suited for those who enjoy the natural ambience of a crackling fire.
- Electric Sauna Heater: Electric heaters are a convenient and user-friendly option. They offer precise temperature control and are relatively easy to install and maintain. However, some users find the heat from electric heaters to feel less radiant and more akin to a dry heat compared to wood-fired saunas. See all our electric heaters here.
- Infrared Sauna Panels: Infrared saunas use infrared light technology to directly heat your body rather than the air. This can provide a more comfortable and therapeutic heat experience for some users, as it allows for lower overall sauna temperatures. However, infrared saunas typically take longer to pre-heat and may not offer the same level of intense heat as traditional sauna heaters. See all our infrared saunas here.
Here’s a table summarizing the key differences between wood-fired, electric, and infrared sauna heaters:
|
Feature |
Wood-Fired |
Electric |
Infrared |
|
Heat Source |
Firewood |
Electricity |
Infrared Light Panels |
|
Heat Type |
Radiant Heat |
Convection Heat |
Radiant Heat (on body) |
|
Temperature Control |
Manual |
Precise Thermostat Control |
Moderate Control |
|
Pre-Heat Time |
Faster |
Slower |
Slowest |
|
Maintenance |
Requires Regular Refueling and Ash Removal |
Low Maintenance |
Low Maintenance |
|
Cost (Upfront) |
Generally More Expensive |
Moderate Cost |
Moderate Cost |
|
Cost (Operation) |
Lower Operating Costs (Fuel) |
Higher Operating Costs (Electricity) |
Moderate Operating Costs (Electricity) |
|
Ambience |
Traditional, Crackling Fire |
Clean and Modern |
May Feel Less Atmospheric |
Choosing the right heat source depends on your personal preferences, budget, and desired sauna experience. Consider the factors outlined above to make the best decision for your outdoor sauna.
How Do You Frame an Outdoor Sauna?
Framing an outdoor sauna requires careful planning and proper construction techniques to ensure a sturdy, weatherproof structure. Here’s a general overview of the process, but remember this is a more advanced step. It’s recommended to consult detailed building guides or consider professional help for sauna construction, especially if you’re not comfortable with carpentry work.
For those who are interested in the DIY approach, here’s a basic breakdown:
- Foundation: Prepare a level and stable base for your sauna. This could involve pouring a concrete slab, building a deck foundation, or using pre-cast concrete pavers. Ensure the foundation complies with local building codes.
- Floor Framing: Construct the sauna floor frame using pressure-treated lumber for the subfloor structure (beams and joists) and appropriate flooring material (treated wood slats, concrete, tile) on top, ensuring a slight slope for drainage.
- Wall Framing: Build the sauna walls using dimensional lumber (typically 2x4s) for the studs and plates. Use proper spacing (typically 16 inches on center) and ensure all wall sections are plumb and square.
- Door and Window Framing: Frame the rough openings for your sauna door and any desired windows. Consider the size and placement for ease of access and ventilation.
- Roof Framing: Choose a simple roof design like a gable or shed roof. Construct the roof trusses or rafters using dimensional lumber and ensure proper roof pitch for drainage (depending on your chosen roofing material).
- Insulation: Install mineral wool insulation batts between the wall studs and within the roof structure. Ensure a snug fit and proper coverage to maximize heat retention.
- Vapor Barrier: Apply a high-quality vapor barrier on the warm side of the insulation (interior side of the sauna) to prevent moisture from migrating into the wall cavity.
- Air Gap: Maintain a small air gap between the vapor barrier and the interior wall paneling to allow any trapped moisture to dry out.
Remember: This is a simplified overview. For detailed instructions and specific building code requirements, consult professional resources or experienced sauna builders.
Cost of Building an Outside Sauna By Yourself
The cost of building your own outdoor sauna can vary depending on several factors, including:
- Size: Larger saunas naturally require more materials, driving up the total cost.
- Materials: The type of wood you choose for the interior and exterior, insulation selection, and heater type can significantly impact the price.
- Electrical Work: If you’re installing an electric heater, hiring a licensed electrician will add to the overall cost.
- Complexity: A basic DIY sauna may be achievable with moderate skills, while more intricate designs or features might require professional help, increasing the cost.
That being said, here’s a rough estimate for a DIY outdoor sauna in North America:
- $2,000 – $5,000: This range represents a basic, smaller sauna (1-2 person) built with a wood-framed structure, using common wood choices like untreated spruce for framing and Eastern White Cedar for the interior. Electric heaters typically fall within this range.
- $5,000 – $8,000: This range can accommodate slightly larger saunas (3-4 person) or those constructed with higher quality materials like Western Red Cedar for both interior and exterior, or thermally modified wood for added durability.
Keep in mind: These are just estimates. The actual cost of your sauna can be higher or lower depending on the choices you make. It’s important to factor in additional costs like permits, fasteners, roofing materials, interior benches, and sauna accessories when budgeting for your project.
Is Building the Sauna Yourself Worth it?
There are three main ways to acquire your outdoor sauna: purchasing a pre-made sauna, building it entirely from scratch, or using a DIY sauna kit. Each approach offers distinct advantages and disadvantages, so it’s crucial to consider your needs and preferences before making a decision.
Building from Scratch:
- Customization: Offers complete control over design, size, and materials, allowing you to tailor the sauna to your specific needs and preferences.
- Sense of Accomplishment: Building your own sauna can be a rewarding and empowering experience.
- Potentially Lower Cost: If you’re handy and can source materials efficiently, building from scratch can be slightly cheaper than other options.
- Time Commitment: The most time-consuming option. Requires planning, material selection, cutting, construction, and a good understanding of building principles.
- Expertise Needed: Demands carpentry skills, knowledge of ventilation and insulation techniques for your climate, and potentially electrical knowledge (for electric heaters). You might need to hire professionals like electricians or plumbers.
- Risk of Errors: Mistakes during construction can be costly to fix and compromise functionality or safety.
DIY Sauna Kit:
- Faster Installation: Significantly faster to assemble compared to building from scratch. Kits typically come pre-cut and pre-drilled, requiring assembly rather than extensive construction.
- Easier for DIY Beginners: Kits typically come with detailed instructions and can be manageable for those with moderate DIY skills.
- Reduced Risk of Errors: Pre-fabricated components minimize the chance of making mistakes during construction.
- Some Customization: May offer some options for customization, like size or bench layout.
- Higher Upfront Cost: Generally more expensive upfront than buying raw materials for a DIY build.
- Less Customization: Less control over design and materials compared to building from scratch.
Pre-Made Sauna:
- Fastest Option: The fastest and easiest way to acquire a sauna. Typically arrives fully assembled or requires minimal on-site assembly.
- Easiest for Beginners: No construction or assembly required. Ideal for those with limited DIY experience or time.
- Warranties: Most pre-made saunas come with warranties, providing some protection in case of defects.
- Highest Cost: The most expensive option due to the convenience and pre-fabrication.
- Least Customization: Limited to the pre-designed options offered by the manufacturer.
Here’s a table summarizing the key differences between building your sauna from scratch, using a DIY kit, or buying a pre-made sauna:
|
Feature |
Building from Scratch |
DIY Sauna Kit |
Pre-Made Sauna |
|
Time Commitment |
Highest |
Medium |
Lowest |
|
Cost |
Potentially Lowest (with expertise) |
Medium |
Highest |
|
Expertise Needed |
Highest (carpentry, construction knowledge) |
Medium (DIY skills) |
Lowest (no construction required) |
|
Customization |
Highest |
Some Customization |
Lowest |
|
Risk of Errors |
Highest |
Medium |
Lowest |
|
Assembly Difficulty |
Most Difficult |
Moderate Difficulty |
Easiest |
Ultimately, the best choice depends on your budget, DIY skills, desired level of customization, and time constraints.
For a truly personalized sauna experience with the potential for cost savings, building from scratch might be ideal (if you possess the necessary skills). If you prioritize speed, ease of assembly, and a warranty you can look at our outdoor sauna collection. DIY kits offer a middle ground, providing some customization with a faster assembly process compared to building entirely from scratch.
FAQs
You can build your own outdoor sauna, however it takes a lot of planning and skills.
Outdoor saunas can be powered by electric heaters, wood-fired heaters, or even infrared panels.
Yes, proper ventilation is crucial for removing excess moisture and maintaining a comfortable environment in your outdoor sauna.
Outdoor saunas function perfectly well in winter, providing a warm and inviting retreat from the cold.
In most cases, an outdoor sauna will need a stable foundation to ensure proper support and prevent settling.
Yes, a drain is necessary in your outdoor sauna to allow water runoff and prevent moisture build-up.