Sauna
How to Clean a Sauna? A Full Guide With Crucial Tips
The cleanliness of a sauna is a crucial part of hygiene and its longevity for the rest of the years. In the following page you’ll get the full guide.
Maintaining a clean and hygienic sauna is essential for a truly rejuvenating experience. Not only does it ensure a pleasant environment free from lingering odors, but it also helps preserve the natural beauty and longevity of your sauna wood. In this guide, we’ll delve into the proper techniques for cleaning your sauna, from tackling everyday dirt and sweat to preventing the growth of mold and mildew. We’ll cover everything you need to know, including the best cleaning solutions to use, how often to clean different components, and helpful tips to keep your sauna smelling fresh and inviting. With a little regular care, you can ensure your sauna continues to be a sanctuary of relaxation and well-being for years to come.
The Steps to Cleaning a Sauna Correctly
-
Sweep and Vacuum
Regularly removing surface dirt is essential for maintaining a clean and hygienic sauna environment. Here’s how to tackle this step effectively:- Gather the right tools: Opt for a soft-bristled broom or a handheld vacuum cleaner with a soft brush attachment. Avoid stiff bristles or straw brooms, as they can scratch the delicate wood surfaces. A small, handheld vacuum is ideal for maneuvering around tight spaces and benches.
- Start with a thorough sweep: Begin by sweeping the floor, walls, and ceiling to remove loose dirt, leaves, and debris. Pay close attention to corners and behind benches where dust tends to accumulate.
- Vacuum for a deeper clean: After sweeping, use the handheld vacuum with the soft brush attachment to remove any lingering dust particles that may have settled on the wood. Be gentle and avoid using excessive suction, which could damage the wood.
- Pro tip: Consider using a microfiber cloth for a final wipe-down of the walls and benches to capture any remaining dust before proceeding to the next cleaning step. Microfiber cloths are gentle and won’t leave behind any lint.
- Gather the right tools: Opt for a soft-bristled broom or a handheld vacuum cleaner with a soft brush attachment. Avoid stiff bristles or straw brooms, as they can scratch the delicate wood surfaces. A small, handheld vacuum is ideal for maneuvering around tight spaces and benches.
-
Remove Sweat and Dirt Stains
Sweat and dirt can leave behind unsightly stains on your sauna’s wooden surfaces. Here’s how to tackle them effectively while remaining gentle on the wood:- Choose your cleaning solution wisely: Avoid harsh chemicals or abrasive cleaners, as they can damage the wood’s natural oils and protective layer. Opt for a mild dish soap diluted in warm water, a solution of white vinegar and water (1:5 ratio), or a specialized sauna cleaner.
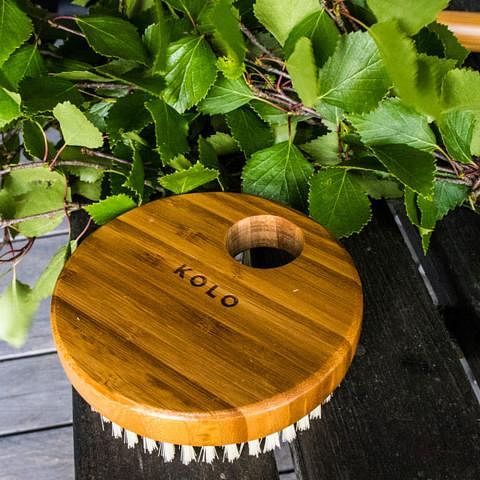
- Tools for the job: Use a soft-bristled brush or a non-abrasive sponge to gently scrub the stained areas. Avoid using steel wool or scouring pads, which can scratch the wood.
- Tackling stubborn stains: For persistent stains, create a paste using baking soda and a small amount of water. Apply the paste directly to the stain and let it sit for 15-20 minutes. Scrub gently with the soft brush and rinse thoroughly with clean water.
- Neutralize and dry: After cleaning with your chosen solution, rinse the area with clean water to remove any soap residue. Allow the wood to air dry completely before using the sauna again.
- Pro tip: To prevent sweat stains in the first place, encourage sauna users to shower before entering and to use towels while sitting on the benches. This will minimize direct contact with the wood and reduce the chances of staining.
- Choose your cleaning solution wisely: Avoid harsh chemicals or abrasive cleaners, as they can damage the wood’s natural oils and protective layer. Opt for a mild dish soap diluted in warm water, a solution of white vinegar and water (1:5 ratio), or a specialized sauna cleaner.
-
Clean the Vents
Maintaining clean vents is crucial for optimal sauna performance and hygiene. Here’s how to ensure your sauna’s ventilation system is functioning properly:
- Gather the right tools: You’ll need a vacuum cleaner with a crevice attachment, a soft brush, and a disinfectant solution suitable for saunas (consult your sauna’s manual or manufacturer’s recommendations). Avoid using harsh chemicals or bleach, which can damage the vent covers or surrounding wood.
- Gently remove debris: Use the crevice attachment on your vacuum cleaner to remove any visible dust, cobwebs, or debris from the vent openings. Be careful not to force the attachment into the vents, as this could damage the delicate grills.
- Brush away stubborn dirt: For any lingering dust or grime inside the vents, use a soft brush to gently dislodge the particles. You can also try holding the vacuum cleaner hose near the vent opening while brushing to suck up loosened debris.
- Disinfect for a fresh start: Once the vents are free of debris, disinfect them using a solution approved for saunas. Spray the solution onto a clean cloth and wipe down the vent covers and surrounding areas. Never spray disinfectant directly into the vents, as this could damage the ventilation system.
- Pro tip: Consider removing the vent covers (if possible according to your sauna model) for a more thorough cleaning. Soak the covers in a warm water and disinfectant solution for 15-20 minutes. Rinse them thoroughly and allow them to air dry completely before reinstalling them. This will remove any deep-seated dirt or mold growth that might be present.
- Gather the right tools: You’ll need a vacuum cleaner with a crevice attachment, a soft brush, and a disinfectant solution suitable for saunas (consult your sauna’s manual or manufacturer’s recommendations). Avoid using harsh chemicals or bleach, which can damage the vent covers or surrounding wood.
-
Don’t Forget the Accessories
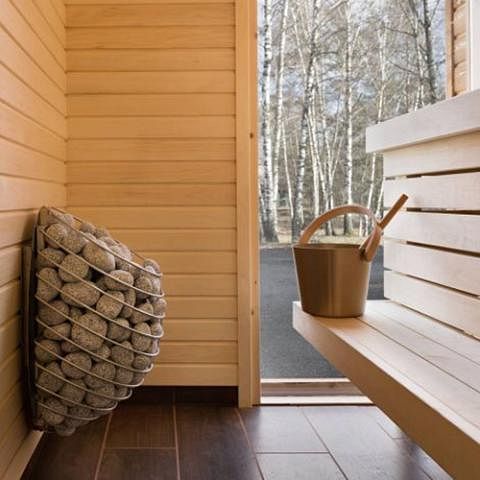
A clean sauna experience extends beyond the walls and benches. Here’s how to properly clean your sauna accessories for optimal hygiene and performance:- Cleaning Saunas Stones (Electric Heaters): For electric heaters with sauna stones, you won’t need frequent cleaning. However, once or twice a year, remove the stones and rinse them thoroughly with clean water. Discard any cracked or broken stones. Never use soap or detergents on the stones, as this can affect their heat retention properties.
- Cleaning Saunas Stones (Wood-Burning Heaters): Wood-burning sauna heaters require more frequent cleaning of the stones (every few sessions). After the fire has died down and the stones have cooled, remove any ashes or debris from the surface. You can rinse the stones with clean water, but avoid using soap.
- General Accessory Cleaning: Wipe down other sauna accessories like headrests, buckets, and ladles with a solution of warm water and mild dish soap. Rinse them thoroughly and allow them to air dry completely before storing.
- Disinfecting High-Touch Areas: Pay particular attention to disinfecting high-touch areas like door handles, light switches, and control panels. Use a disinfectant solution approved for saunas and wipe these areas down with a clean cloth.
- Pro tip: Invest in a separate ladle specifically for throwing water on the stones. This will help prevent sweat and other contaminants from transferring from your body to the stones, which can impact their performance and hygiene.
- Cleaning Saunas Stones (Electric Heaters): For electric heaters with sauna stones, you won’t need frequent cleaning. However, once or twice a year, remove the stones and rinse them thoroughly with clean water. Discard any cracked or broken stones. Never use soap or detergents on the stones, as this can affect their heat retention properties.
-
Look for Bad Smells and Get Rid of Them
An unpleasant odor in your sauna can be a real turn-off. Here’s how to identify the source of the smell and eliminate it for a fresh and inviting sauna experience:- Identify the Culprit: The first step is to pinpoint the source of the odor. Take a good sniff around the sauna, paying close attention to areas like the floorboards, benches, vents, and behind the heater.
- First Suspects: Common culprits for bad smells in saunas include:
- Mold and Mildew: These thrive in damp environments. Check for musty smells and any visible signs of mold growth, particularly in areas with poor ventilation.
- Burnt Wood: This can occur if the sauna heater is used improperly or if there’s debris on the sauna stones (wood-burning heaters).
- Body Odor: While regular cleaning helps, lingering sweat or body odor can sometimes linger on the wood.
- Mold and Mildew: These thrive in damp environments. Check for musty smells and any visible signs of mold growth, particularly in areas with poor ventilation.
- Tackling Different Odors:
- Mold and Mildew: Address mold growth promptly using a solution specifically designed for saunas. Follow the manufacturer’s instructions for application and ventilation. Ensure proper airflow and drying after each use to prevent future growth.
- Burnt Wood: Air out the sauna thoroughly and identify the cause of the burning smell. Clean the sauna stones (if applicable) and ensure proper heater operation.
- Body Odor: Increase ventilation after each use and encourage sauna users to shower beforehand and use towels while sitting on the benches. Regularly clean the benches with a mild cleaning solution.
- Mold and Mildew: Address mold growth promptly using a solution specifically designed for saunas. Follow the manufacturer’s instructions for application and ventilation. Ensure proper airflow and drying after each use to prevent future growth.
- Pro Tip: After each sauna session, leave the door open for several hours to allow for proper ventilation and drying. This will help prevent moisture buildup and the growth of odor-causing bacteria and mold. You can also consider placing a bowl of white vinegar or baking soda inside the sauna after use to absorb lingering odors. Remember to remove them before your next sauna session.
- Identify the Culprit: The first step is to pinpoint the source of the odor. Take a good sniff around the sauna, paying close attention to areas like the floorboards, benches, vents, and behind the heater.
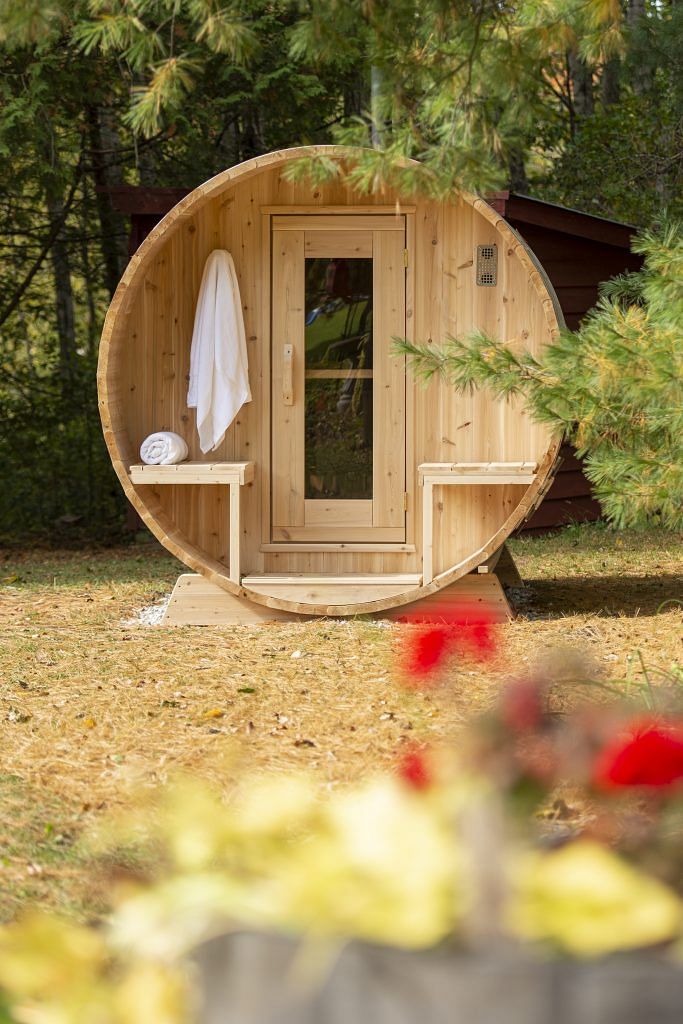
How to Clean a Cedar Sauna
Cedar’s natural oils contribute to its resistance to mold and mildew, but regular cleaning is still crucial for maintaining its beauty and aroma. Here are some key points to remember when cleaning your cedar sauna:
- Minimize Water Exposure: While cedar is water-resistant, excessive moisture can cause warping or discoloration. Focus on using damp cloths for cleaning, and avoid soaking the wood.
- Natural Cleaning Solutions: Harsh chemicals can strip away cedar’s natural oils and dull its beautiful luster. Opt for gentle cleaners like diluted dish soap and water, white vinegar and water, or a solution specifically designed for saunas.
- Maintain Ventilation: After each use, leave the sauna door open for several hours to allow moisture to escape and prevent mold growth. You can also consider using a strategically placed fan to circulate air and aid drying between sessions.
- Sanding for Deep Cleaning: Cedar is a relatively softwood. If you encounter stubborn stains or want to restore the wood’s natural appearance over time, very fine-grit sandpaper can be used. However, this should be done sparingly and with extreme care. Test the sanding process in an inconspicuous area first.
- Cedar Oil Treatment (Optional): Unlike some woods, cedar doesn’t require regular oiling to maintain its moisture resistance. However, some sauna owners choose to apply a thin coat of high-quality cedar oil every few years to enhance the wood’s natural shine. Ensure the oil is suitable for saunas and follow the product’s instructions carefully.
How to Clean a Portable Sauna
Portable saunas offer the flexibility of at-home sauna enjoyment, but their compact size requires slightly different cleaning considerations. Here’s what to keep in mind:
- Focus on Disassembly (if possible): Many portable saunas allow for partial disassembly of the benches and backrest. This allows for easier cleaning of all surfaces, including areas that might trap sweat and moisture.
- Pay Attention to Folds and Seams: Extra attention is needed around the folds and seams of the sauna fabric to prevent mold growth. Wipe these areas thoroughly after each use and allow them to dry completely before storing.
- Consider Ventilation After Use: Even with proper drying, some moisture can get trapped within the fabric layers. If possible, set the sauna up outdoors in indirect sunlight for a few hours after use to promote thorough drying.
How to Clean a Dry Sauna
Dry saunas, reaching higher temperatures than steam saunas, offer a unique heat therapy experience. However, their dry environment requires slightly different cleaning techniques:
- Focus on Sweat Removal: The primary concern in dry saunas is sweat, not moisture build-up. Regular wiping down of the benches and walls with a damp cloth after each use is essential.
- Shorter Airing Out Time: Since dry saunas don’t generate significant steam, they may require less airing out time compared to steam saunas. However, leaving the door open for at least 30 minutes after use is still recommended to allow for proper ventilation.
- Pay Attention to Sauna Stones (if applicable): If your dry sauna uses electric heaters with sauna stones, you’ll still need to clean them occasionally. Rinse the stones with clean water (avoid soap) once or twice a year, and discard any cracked or broken ones.
How to Clean a Infrared Sauna
Infrared saunas utilize radiant heat panels instead of traditional saunas’ heated stones or steam. This difference translates to a simpler cleaning process:
- Focus on Surface Wiping: As with dry saunas, the main concern is sweat removal. Wipe down the walls, benches, and floor with a damp cloth after each use.
- No Need for Stone Cleaning: Since there are no sauna stones involved, you can skip the cleaning steps typically required for traditional saunas.
- Standard Ventilation Practices: Similar to dry saunas, allow for proper ventilation after use by leaving the door open for 30 minutes or more.
How to Clean a Personal Sauna
Personal saunas, often a type of portable sauna designed for single use, require similar cleaning considerations to portable saunas in general. Here’s a quick rundown:
- Disassemble for Cleaning (if possible): Many personal saunas allow for some level of disassembly, like a footrest or backrest. This facilitates thorough cleaning of all surfaces, especially crevices where sweat and moisture might accumulate.
- Focus on Folds and Seams: Similar to portable saunas, pay close attention to the folds and seams of the sauna fabric to prevent mold growth. Wipe these areas thoroughly after each use and allow them to dry completely before storing the sauna.
- Quick Drying is Key: Due to their smaller size, personal saunas can trap moisture more easily. After use, prioritize drying the sauna completely. If possible, set it up in a well-ventilated area with indirect sunlight for a few hours to promote thorough drying.
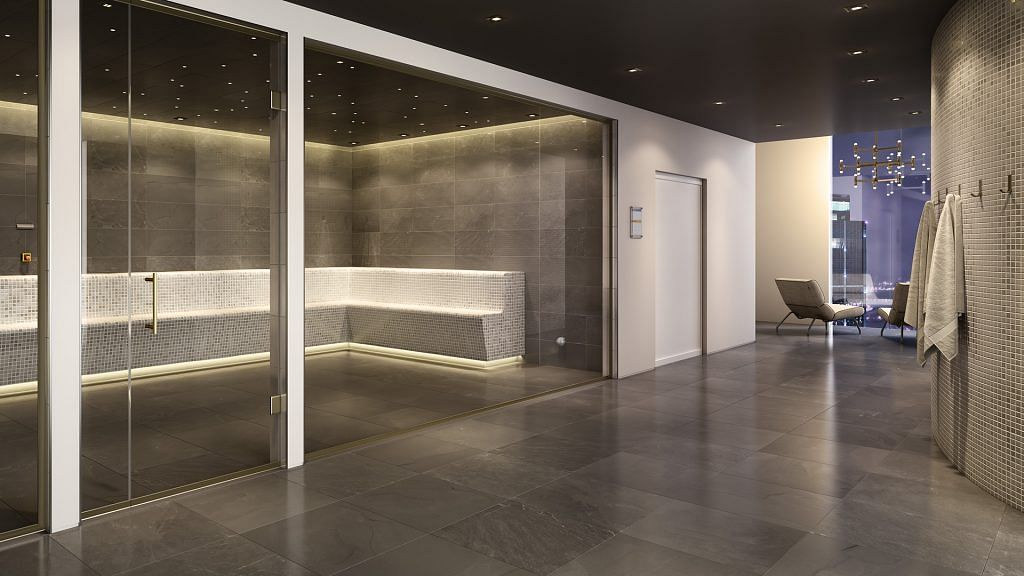
How to Clean a Steam Sauna
Steam saunas, known for their moist heat environment, require a slightly different cleaning approach compared to dry saunas or infrared saunas. Here’s what to remember:
- Prioritize Moisture Removal: The high humidity in steam saunas creates an ideal environment for mold growth. After each use, thoroughly wipe down the walls, benches, and floor with a damp cloth to remove sweat and excess moisture. Pay particular attention to corners and crevices where moisture can accumulate.
- Increased Ventilation is Crucial: Due to the higher moisture content, steam saunas require more extensive ventilation compared to dry saunas. Leave the door open for several hours after each use to allow for proper air circulation and drying. Consider using a fan to promote air movement and expedite the drying process.
- Cleaning the Steam Generator: The steam generator is the heart of a steam sauna, and regular cleaning is essential for its optimal performance and hygiene. Consult your sauna’s manual or manufacturer’s recommendations for the specific cleaning process. It typically involves using a mild dish soap solution and ensuring thorough rinsing.
- Disinfect Regularly: While harsh chemicals are a no-no, disinfecting the sauna with a solution approved for saunas is recommended 1-2 times a month. This helps prevent the growth of mold and mildew that thrive in the moist environment.
How to Maintain the Wood of the Sauna?
The wood in your sauna is not just aesthetically pleasing, it also contributes to the overall sauna experience. Here’s how to properly clean and maintain the wood to ensure its longevity and beauty:
- Regular Cleaning: As discussed earlier, routine cleaning with a mild solution (diluted dish soap and water, white vinegar and water) and a soft-bristled brush or non-abrasive sponge is essential. Rinse thoroughly and allow the wood to air dry completely.
- Disinfection: While harsh chemicals are a no-no, disinfecting the wood periodically is important. Opt for a sauna-approved disinfectant solution and follow the manufacturer’s instructions for application and dilution. Never apply disinfectant directly to the wood. Spray it onto a clean cloth and wipe down the surfaces.
- Pro Tip: Sanding can be a lifesaver for removing stubborn stains or reviving the wood’s appearance over time. However, this should only be done occasionally and with extreme care. Use a very fine-grit sandpaper and only after the wood is completely dry. Lightly sand the affected area, then wipe clean and treat the wood with a sauna-approved wood wax or oil to restore its luster and protect it from moisture. Remember to test the sanding and wax on an inconspicuous area first to ensure compatibility with your wood type.
Moisture Management
Moisture is the enemy of wood in a sauna environment. Here’s how to keep it under control:
- Ventilation is Key: Ensure proper ventilation after each use by leaving the sauna door open for several hours. This allows moisture to escape and prevents mold growth.
- Towel It Off: Encourage sauna users to use towels while sitting on the benches to absorb sweat and minimize direct contact with the wood.
- Drying Between Uses: If your sauna experiences heavy use, consider using a strategically placed fan to circulate air and aid drying between sessions.
Wood Specifics
While the cleaning process is generally similar for most common sauna woods (spruce, hemlock, aspen), there can be slight variations:
- Spruce and Hemlock: These woods are more resistant to moisture and warping, making them a good choice for saunas. However, they can be slightly more susceptible to staining. Be diligent with wiping up spills and sweat promptly.
- Aspen: This lighter-colored wood is naturally resistant to mold and mildew. However, it’s also a softer wood and requires extra care when cleaning. Avoid using excessive force or abrasive materials.
How to Avoid Bad Smell in Your Sauna?
Preventing bad odors in your sauna is easier than eliminating them once they take hold. Here are some best practices to keep your sauna smelling fresh and inviting:
- Moisture Control: As mentioned earlier, moisture is a breeding ground for odor-causing bacteria and mold. Ensure proper ventilation after each use by leaving the door open for several hours. Encourage users to towel off regularly to minimize sweat pooling on the benches.
- Regular Cleaning: Develop a regular cleaning routine. This includes wiping down the walls, benches, and floor with a mild cleaning solution after each use. Pay close attention to areas where sweat and dirt tend to accumulate, like corners and behind the heater.
- Disinfect Regularly: While harsh chemicals are a no-no, disinfecting the sauna periodically with a sauna-approved solution helps prevent the growth of bacteria and mold that can cause musty odors.
- Cleanliness Between Users: Encourage users to shower before entering the sauna to remove any lingering body odors.
- Air Out Strong Smells: Avoid using strong-smelling soaps, shampoos, or lotions in the sauna, as these scents can linger on the wood.
- Natural Deodorizers: After the sauna has cooled completely, consider placing a bowl of baking soda or white vinegar inside to absorb any lingering odors. Remove these before your next sauna session.
- Deep Clean Occasionally: In addition to regular cleaning, perform a more thorough deep clean a few times a year. This may involve cleaning the vents, checking for mold growth (particularly in areas with poor ventilation), and potentially removing the sauna stones (if applicable) for cleaning.
By following these preventative measures, you can significantly reduce the chances of encountering unpleasant odors in your sauna, allowing you to enjoy a truly refreshing and relaxing experience.
How Often Should You Clean a Sauna?
The cleaning frequency for your sauna depends on usage. Here’s a quick guide:
- Sweeping: After each use, sweep the floor, benches, and walls to remove loose dirt and debris.
- Disinfecting: Disinfect the sauna with a sauna-approved solution 1-2 times a month, depending on usage.
- Deep Cleaning and Stain Removal: Perform a more thorough cleaning, including removing stains and checking for mold, every 3-4 months or more frequently for heavily used saunas.
Other Important Tips for Sauna Cleanliness
Shower Before a Sauna
This removes sweat, lotion, and other contaminants that can clog the wood and create odors, making your sauna experience more hygienic and enjoyable.
Use a Towel
Towels absorb sweat and minimize direct contact with the wood, reducing the risk of stains and lingering odors. It also makes the sauna experience more comfortable for everyone.
Air Out the Sauna
Leaving the door open for several hours after each use allows moisture to escape and prevents mold growth, which can cause unpleasant odors and potential health problems.
Make Sure the Sauna Has Cooled Down
Never clean a hot sauna! Hot wood is more susceptible to warping and damage from cleaning products. Wait for it to cool completely for safe and effective cleaning.
Don’t Use High Water Pressure
While water is great for cleaning, a gentle stream is sufficient. High water pressure can damage the wood, especially softer varieties.
Use Natural Cleaning Materials
Harsh chemicals can damage the wood and leave behind harmful residues. Opt for natural cleaning solutions like diluted dish soap and water, or white vinegar and water, for a safe and effective clean.
Don’t Use Paint
Paint creates a barrier that traps moisture and can damage the wood in the long run. Saunas benefit from the natural properties of untreated wood, allowing it to breathe and regulate humidity effectively.
