


Sauna
Sauna Maintenance: The Full Guide for Your Sauna’s Longevity

Jun
A sauna is a big investment and maintaining it properly is the key element to make it last longer. How do you do it? We wrote a full guide that will help you.
Maintaining your sauna is key to getting the most out of this therapeutic and relaxing experience. This comprehensive guide will walk you through all the essential steps to keep your sauna sparkling clean, functioning efficiently, and enjoyable for years to come. From everyday routines like preheating and proper cleaning techniques to in-depth maintenance checks for heaters and ventilation, we’ll cover everything you need to know. We’ll also explore how to tailor your maintenance approach to different sauna wood types and shapes, ensuring a personalized approach to your sauna’s well-being. So, grab your ladle and settle in as we delve into the world of sauna maintenance!
Everyday Sauna Care
Preheat the Sauna
A sauna session isn’t just about relaxation and rejuvenation; it’s also about maintaining a clean and hygienic environment. Regularly preheating your sauna is an essential part of everyday care. Here’s why:
- Curing: When a new sauna is built, the wood needs time to adjust to the high temperatures. Preheating helps to expel moisture from the wood, preventing warping and cracking. This curing process typically takes several sessions at gradually increasing temperatures.
- Killing Bacteria: The hot, dry environment of a sauna is inhospitable to most bacteria and fungi. Preheating to your target temperature (typically around 150-195°F or 65-90°C) for 30-60 minutes effectively eliminates any lingering bacteria or mold spores. This helps to prevent the growth of mildew and ensures a fresh, clean environment for your sauna sessions.
By preheating your sauna regularly, you’re not just preparing it for use, you’re also taking proactive steps to extend its lifespan and promote a healthy bathing experience. The best time to do it is 30-60 minutes before you enter your sauna session.
Clean Yourself
Just as important as preheating the sauna is cleaning yourself before entering. Here’s why:
- Hygiene: Sweat carries dirt, oils, and dead skin cells from your body. Leaving this residue behind can attract bacteria and create unpleasant odors, especially in a shared sauna environment.
- Sauna Maintenance: Rinsing off with warm water and soap removes this residue, preventing it from building up on the sauna benches and floor. This not only keeps the sauna clean but also reduces the need for harsh cleaning products that can damage the wood.
Taking a quick shower before your sauna session benefits both you and your sauna.
Use Towels
Towels play a vital role in maintaining sauna hygiene and protecting the wood. Here’s why:
- Hygiene: Sweat carries bacteria and body oils. Sitting directly on the benches allows this residue to transfer, creating an unsanitary environment for future users. Towels act as a barrier, absorbing sweat and keeping the benches clean.
- Sauna Protection: Wood is susceptible to moisture damage and warping. Sweat can soak into the untreated wooden benches, leading to rot and premature wear. Towels absorb sweat, preventing it from reaching the wood and extending the sauna’s lifespan.
- Comfort: Sitting on a bare wooden bench in a hot sauna can be uncomfortable. Towels provide a layer of insulation, making your sauna experience more enjoyable. This is especially true in traditional Scandinavian saunas, where nudity is the norm.
- Swimsuit Limitations: While some saunas allow swimsuits, they’re not ideal for the high temperatures. Synthetic materials can trap heat and become uncomfortable, while some fabrics may even melt or release harmful fumes. Towels offer a more breathable and safer alternative.
Use Filtered Water
Consider using filtered water for throwing on the sauna rocks. While tap water may work, filtered water provides some benefits:
- Improved Aroma: Minerals in tap water can leave an unpleasant odor when vaporized. Filtered water produces cleaner-smelling steam, enhancing your sauna experience.
- Reduced Scale Buildup: Minerals in hard water can build up and leave scale deposits on the sauna heater and rocks. Filtered water minimizes this risk, helping to maintain the efficiency and lifespan of your sauna equipment.
Air Out the Sauna
Just like any room, saunas need to breathe to prevent moisture buildup and promote healthy air circulation. Here’s why airing out your sauna is crucial:
- Moisture Control: The hot, humid environment of a sauna is perfect for relaxation, but it can also lead to moisture buildup. This moisture can create a breeding ground for mold and mildew, which can damage the wood and create unpleasant odors.
- Fresh Air Exchange: Regularly airing out your sauna allows fresh air to replace stale, moist air. This helps to remove any lingering sweat or wood odors, leaving your sauna smelling fresh and inviting for the next session.
When to Air Out:
- After Every Use: After each sauna session, leave the door open for at least 30 minutes to an hour to allow moisture to escape.
- Deep Cleaning: When performing a more thorough cleaning, open all vents and doors to ensure maximum air circulation.
Clean the Sauna
Maintaining a clean sauna is essential for its longevity and your enjoyment. Here’s a quick guide to regular cleaning:
- Shallow Cleaning: After each use, wipe down the benches, floor, and walls with a damp cloth dipped in warm water mixed with a mild, wood-safe cleaning solution. Rinse the cloth frequently and allow everything to air dry completely.
- Deep Cleaning: For a more thorough clean, you can use a solution of white vinegar and water (equal parts) to disinfect surfaces. For stubborn stains, a light sanding with fine-grit sandpaper might be necessary. Avoid harsh chemicals or abrasive cleaners, as they can damage the wood. Deep cleaning is recommended once a month for frequent sauna users, or every few months for occasional use.
We wrote a full article on how to clean a sauna. If you’re interested, check it out
Perform Sauna Maintenance Checks
Regular maintenance checks are crucial for ensuring the safe and efficient operation of your sauna. These proactive steps can help identify and address minor issues before they become major problems. Here’s how to perform basic maintenance checks:
Frequency: Conduct a thorough inspection every 3-6 months, depending on usage frequency.
What to Check:
- Heater and Controls: Visually inspect the heater for any signs of damage, corrosion, or loose wiring. Check the controls for proper functionality and ensure they operate smoothly.
- Sauna Stones: Inspect the sauna stones for cracks or crumbling. Remove and replace any damaged stones to maintain optimal heat distribution and efficiency.
- Wood Paneling: Look for signs of warping, cracking, or water damage. Check for any loose nails or screws and tighten them if necessary.
- Ventilation: Ensure all vents are clear of obstructions and functioning properly.
By performing these checks regularly, you can catch potential problems early on, preventing costly repairs and ensuring the continued enjoyment of your sauna for years to come.
Check the Sauna Heaters
The sauna heater is the heart of your sauna, and its proper maintenance is vital for safety and efficiency. Here’s a deeper dive into inspecting and maintaining your heater:
- Cleaning: While some heaters have self-cleaning cycles, you might need to remove dust and debris build up occasionally. Consult your owner’s manual for specific cleaning instructions. Typically, you can disconnect the power, allow the heater to cool completely, and then vacuum around the heating elements with a soft brush attachment. Never use water or cleaning solutions directly on the heater.
- Efficiency Check: Over time, heating elements can lose some efficiency. Monitor how long it takes your sauna to reach its target temperature. If heating times increase significantly, it might be a sign that the elements need to be replaced by a qualified technician.
- Damage Inspection: Visually inspect the heater housing for any signs of damage like cracks, dents, or rust. Pay close attention to the area around the heating elements and electrical connections. Look for any signs of burning or discoloration, which could indicate overheating or loose wiring.
- Sauna Stones: While you already learned about inspecting the stones for cracks and crumbling during general maintenance checks, a closer look is warranted here. Remove all the stones and check for any dust or debris buildup between the elements. You can rinse the stones with clean water to remove any dirt. Ensure proper air circulation by loosely restacking the stones according to the manufacturer’s recommendations. Never use broken or chipped stones, as they can crack further and damage the heating elements.
Remember, for any electrical work or repairs involving the heater, consult a qualified electrician to ensure safety and avoid voiding your warranty.
Other Sauna Maintenance Tips
Wood
- Aspen: This light-colored wood is prized for its smooth feel and minimal resin content. However, aspen is more susceptible to moisture stains. To minimize this, dry the sauna thoroughly after each use and allow for ample air circulation. You can also use a light sanding with fine-grit sandpaper to remove stubborn sweat stains, followed by a light application of a wood-safe wax for added protection.
- Thermowood (Aspen and Pine): Thermally treated aspen and pine offer improved moisture resistance compared to untreated versions. However, they can still benefit from occasional light sanding and waxing to maintain their smooth texture and repel dirt.
- Cedar: Western red cedar is a popular choice for saunas due to its natural insect and rot resistance. However, cedar can darken over time. To maintain a lighter color, you can use a wood-safe bleach solution specifically designed for saunas. Apply sparingly and according to the manufacturer’s instructions.
- Pine: Pine is a cost-effective option, but it does require more maintenance. The resin content can leave a sticky feeling, especially at high temperatures. To address this, you can use a mild, vinegar-based solution to remove excess resin after the sauna cools down. Be sure to rinse thoroughly and allow the wood to dry completely.
- Spruce: Similar to pine, spruce is a budget-friendly option but requires more frequent cleaning due to its resin content. You can use the same vinegar-based solution as with pine, followed by a light sanding with fine-grit sandpaper if necessary. Remember to avoid harsh chemicals that can damage the wood.
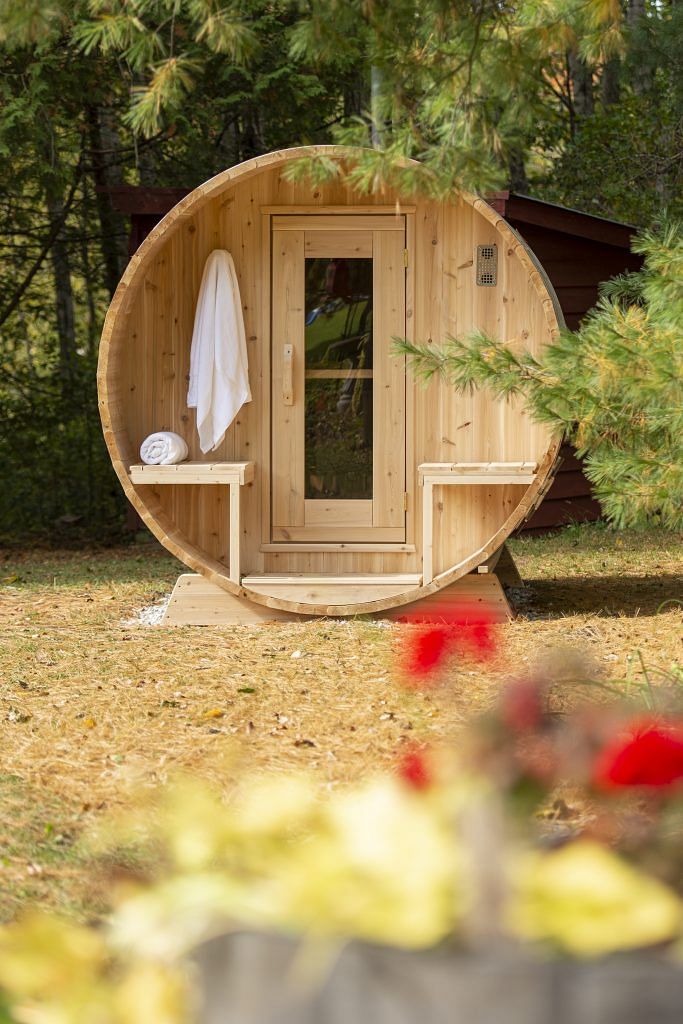
Shape
- Square Saunas: These saunas tend to have more corners and flat surfaces where moisture can accumulate. Pay particular attention to these areas during cleaning to prevent mold growth. You might also consider using a moisture meter to monitor humidity levels and ensure proper ventilation, especially after use.
- Barrel Saunas: The curved design of barrel saunas naturally sheds water, reducing moisture buildup compared to square saunas. However, the barrel shape also makes it more challenging to reach certain areas during cleaning. You might need to use a long-handled brush or specialized cleaning tools to ensure all surfaces are properly cleaned. Additionally, due to exposure to the elements, it’s crucial to inspect the exterior wood regularly for signs of wear and tear. Applying a high-quality, UV-resistant stain or sealant on the exterior can help protect the wood from sun damage and extend its lifespan.